MuleSoft Technical Guides

JSON Logger in MuleSoft


Logging is one of the most fundamental yet overlooked element of any application. Logging serves several purposes like tracking a particular transaction, debugging any errors, creating dashboards, and checking the process of different application processes. MuleSoft uses the log4j2 logging standard for logging events. Some of the best practices in logging include using a transaction id, timestamp, log level and relevant message to get the information. Today we will be looking at one of the other logging ways by using a connector: JSON-Logger.
As the name suggests, the JSON logger prints the JSON format logs, which can help a lot when logging into any external log analytic tool such as ELK or Splunk. It logs the relevant information and is helpful in the customization of content and other fields. JSON logger also supports the functionality for sending data to AMQ or JMS. To use a JSON logger in your application, we need to follow the specific steps explained below:
- First things first, you need to clone the repository on your local system. Since JSON logger is a custom connector and not provided by MuleSoft, we need to push the logger to Anypoint exchange to use it.
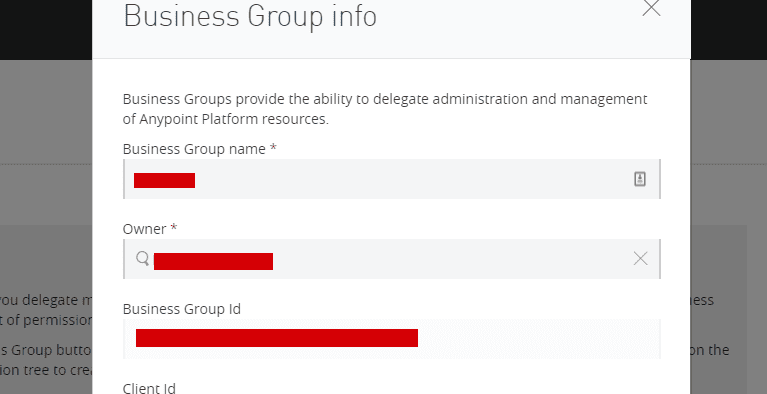
- To push the logger to MuleSoft Anypoint exchange, get the Org Id for your Organization from the MuleSoft Anypoint platform. Go to Access Management > Business Group and Retrieve Org Id. In case you do not have access, you can use Anypoint Platform API to retrieve Org Id
- Add your Anypoint username and password in settings.xml. Since we will be using mule maven plugin to deploy to exchange, make sure you add entry in settings.xml inside servers tag.
<servers>
<server>
            <id>anypoint-exchange-v2</id>
            <username>username</username>
            <password>*****</password>
        </server>
	</servers>
- After adding the credentials, go to the cloned directory and run the shell script with Org Id as a parameter:

- This script will be responsible for pushing your connector to MuleSoft Anypoint business exchange. You can see in exchange.
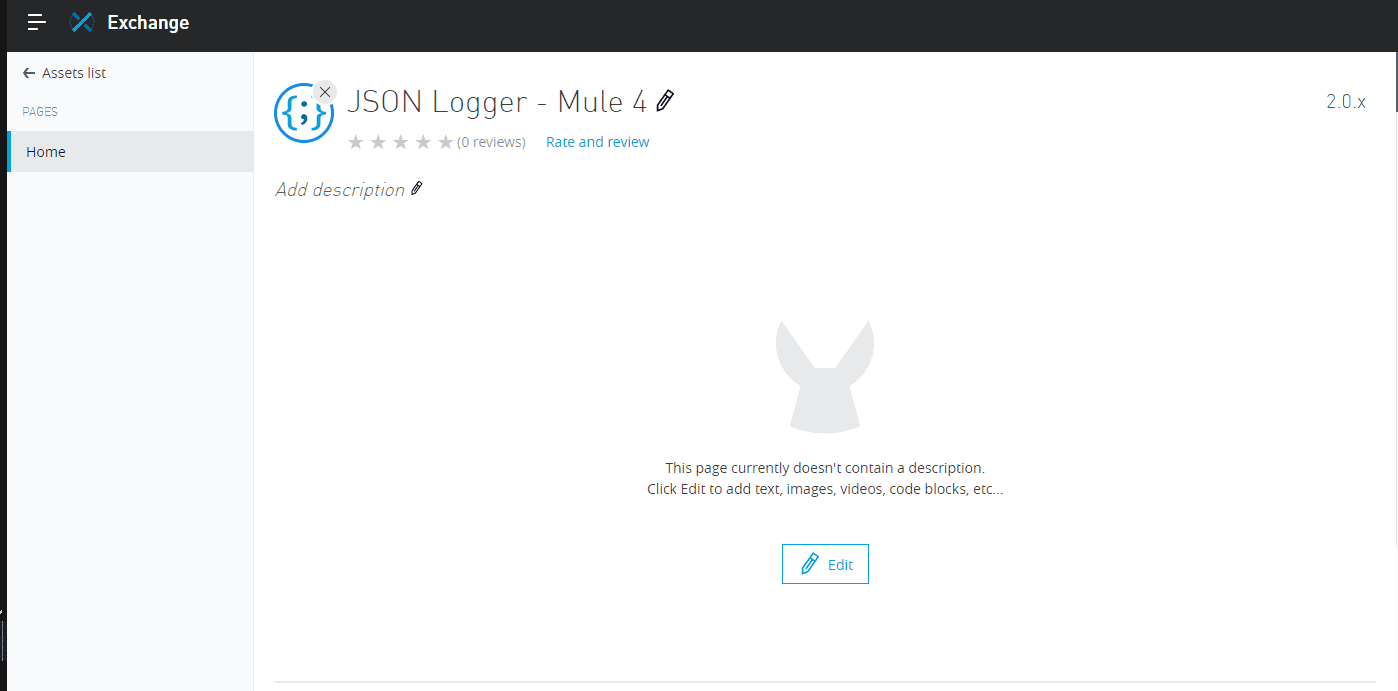
- After pushing the JSON logger to exchange, we can use it in our applications using the dependency in pom.xml. You can get the dependency information from the exchange.
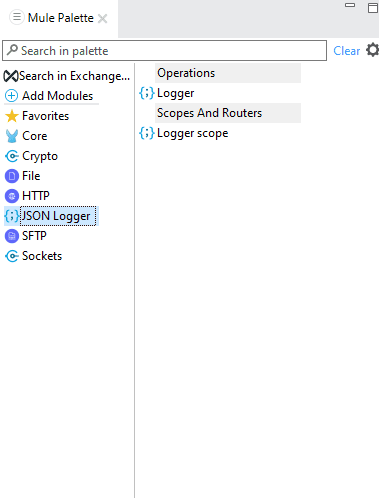
- The connector is handy in the application. Once you add it to the application, you can set the configuration. One can mask any particular field in payload and can disable the content depending on the business case.
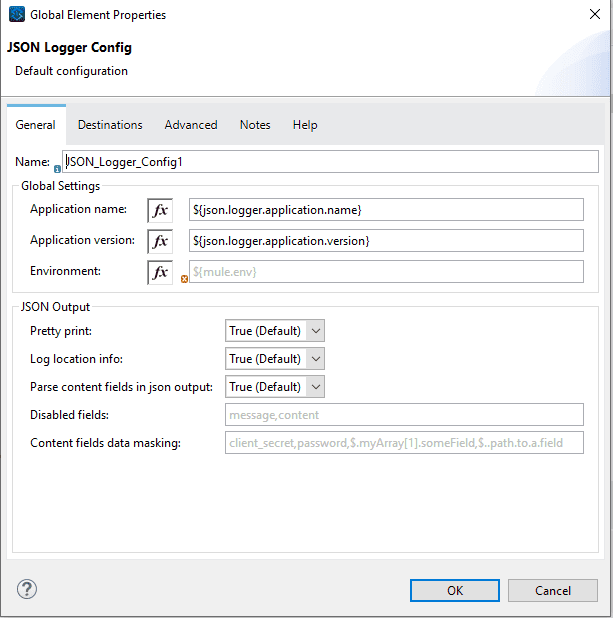
- You can set the message and print the payload depending on the use case. Besides, the MuleSoft developer can set the priority, and trace-point can be set for monitoring.

- Here is an application information snippet
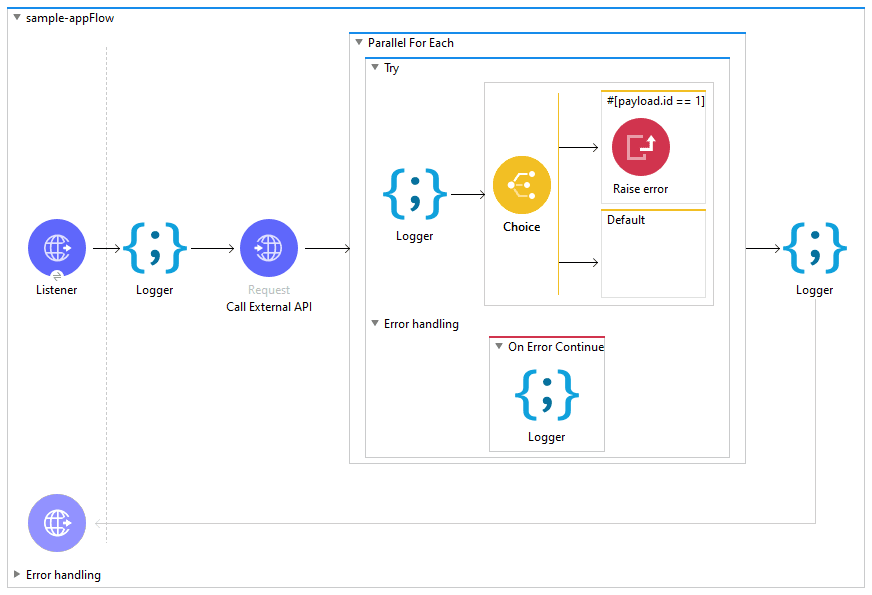
- An Example entry by JSON logger looks like this :
{
  "correlationId" : "1ed87460-6ae1-11eb-a037-6c2b59777f19",
  "message" : "Request for Id: ++ 147",
  "tracePoint" : "AFTER_TRANSFORM",
  "priority" : "INFO",
  "elapsed" : 3415,
  "locationInfo" : {
    "lineInFile" : "18",
    "component" : "json-logger:logger",
    "fileName" : "sample-app.xml",
    "rootContainer" : "sample-appFlow"
  },
  "timestamp" : "2021-02-09T14:14:31.989Z",
  "content" : {
    "payload" : {
      "userId" : 8,
      "id" : 147,
      "title" : "eum itaque quod reprehenderit et facilis dolor autem ut",
      "completed" : true
    }
  },
  "applicationName" : "sample-elk-app",
  "applicationVersion" : "1.0",
  "environment" : "local",
  "threadName" : "[MuleRuntime].uber.07: [sample-elk-app].sample-appFlow.BLOCKING @1e0641d"
}
Recent Blogs
NetSuite Integration using MuleSoft
NetSuite is a cloud-based enterprise resource planning (ERP) software suite that...…
Learn how MuleSoft & Salesforce helps businesses create incredible digital experiences. Speak with one of our consultants today
Let's Work Together