MuleSoft Technical Guides

Business Groups in MuleSoft CloudHub


Business groups are self-contained resource groups that contain MuleSoft Anypoint Platform resources such as applications and APIs. Business groups provide a way to separate and control access to MuleSoft Anypoint Platform resources because users have access only to the business groups in which they have a role. In this article we will discover how to create business groups on MuleSoft CloudHub.
Business groups reside within the master organization. The groups are organized in a hierarchical tree where the top-level business group is the root. Each business group you create has one direct parent and can have multiple children.
Business groups are required when your organization has multiple teams from different departments creating and publishing resources on Mulesoft Cloudhub iPaaS. You don’t want the resources created by one department to be visible to their team and sub department’s teams; for example, the finance department should only have visibility to API’s and exchange resources created by the finance and accounting, not the HR team.
Creating business groups in Mulesoft Cloudhub is pretty straightforward. However, before starting following the below steps, you need to make sure that your user has the organization administrator role, and your organization allows the creation of business groups. Also, business groups are hierarchical; the owner of a parent business group automatically has and retains administrator permissions for any child business group of that parent, even if they make another organization Administrators user owner of a child business group.
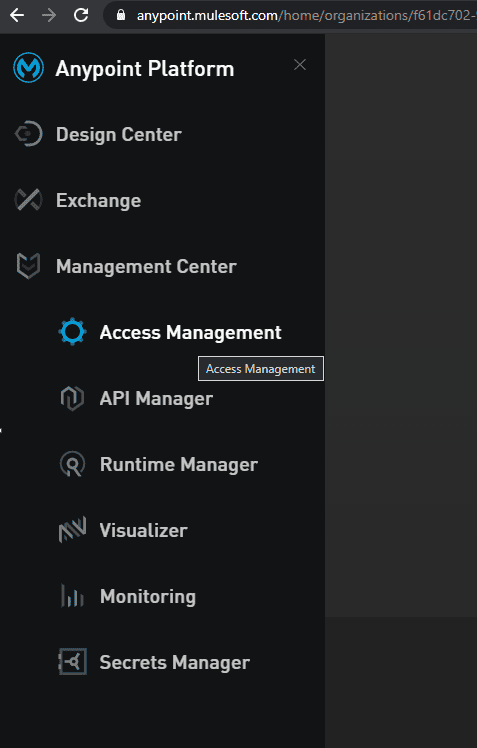
1.In the Anypoint Platform Side Panel Access Management, in the left menu, click organization.
2.Click on the blue plus sign or the Add Business Group button. You will get the following pop up:
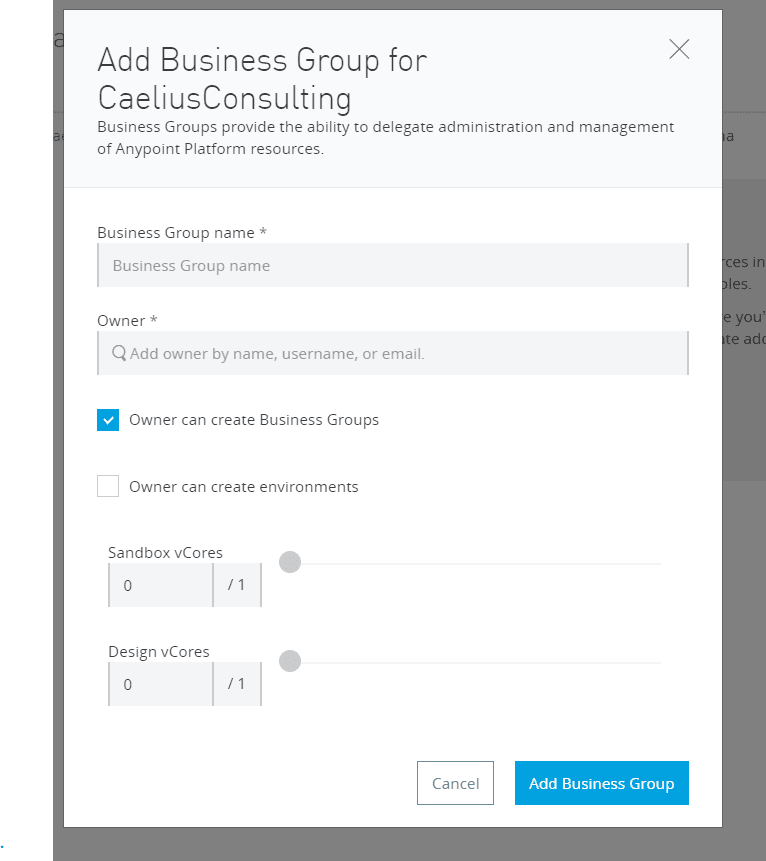
3. Allocate the resources and give business group and Owner name in the pop up.
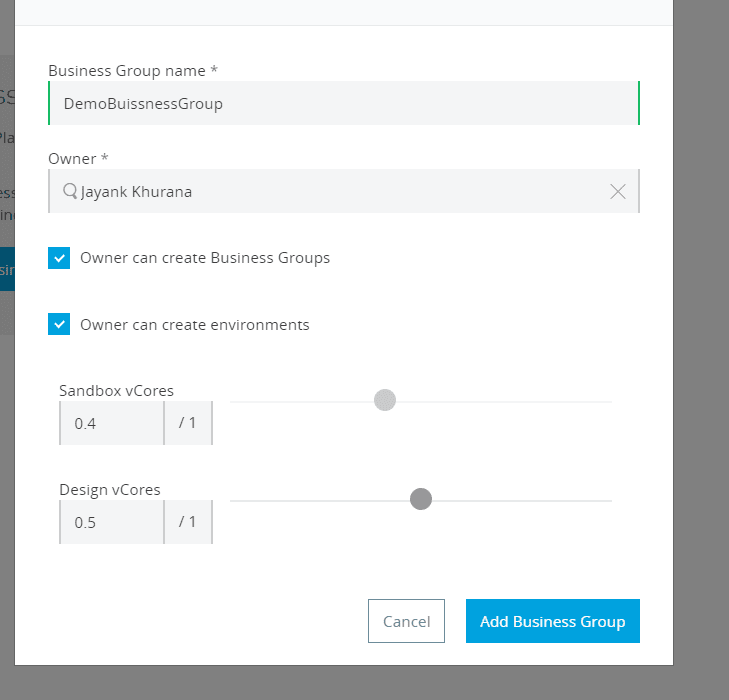
4. Click on Add business group after allocating the resources and giving the required permissions.
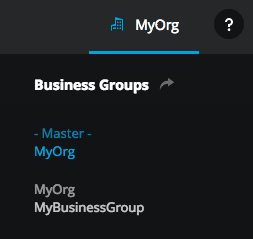
5. Now you can switch between business groups by clicking on the menu at the top right corner.
Feel free to leave comments on creating business groups in MuleSoft CloudHub.
Find more MuleSoft Tips & tricks right here on Caelius Consulting Inc Resource Centre.
Recent Blogs

Understanding Salesforce Flow Approval Processes
Introduction: Salesforce introduced Flow Approval Processes in the Spring '25 re...…

Capturing Real-time Record Updation Using LWC
Introduction In modern CRM ecosystems, real-time Salesforce integration and s...…

All About Schedulers: Mule 4
In the world of Mule 4, automating repetitive tasks and triggering flows at defi...…

Demystifying CloudHub 2.0 Networking
CloudHub 2.0 is the latest version of MuleSoft's powerful managed runtime platfo...…
Learn how MuleSoft & Salesforce helps businesses create incredible digital experiences. Speak with one of our consultants today
Let's Work Together