MuleSoft Technical Guides

All About Schedulers: Mule 4


In the world of Mule 4, automating repetitive tasks and triggering flows at defined intervals is necessary for building efficient and robust integration solutions. This is where Mule 4 schedulers come into use. This blog post explores the intricacies of scheduling in Mule 4, providing practical examples and best practices to help you get deeper understanding of this powerful feature. Whether you’re an experienced MuleSoft developer or an IT student eager to learn, this article will equip you with the knowledge to implement robust Mule 4 scheduling mechanisms. So let’s get started!
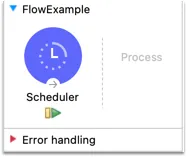
Most of us have used Mule Flows to implement various business logics. A Mule flow has three parts: the event source, flow processors, and error handling.
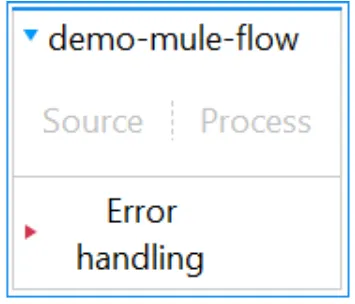
The event source here is primarily responsible for triggering the Mule event.
Understanding the Basics of Mule 4 Schedulers
A Mule 4 Scheduler, at its core, is an event source that triggers a Mule flow based on a defined schedule. This eliminates the requirement of manual intervention for recurring tasks, making integrations more reliable and efficient.
Mule 4 offers different ways to configure these schedules, providing flexibility for numerous use cases.
Configurations and Scheduling Strategies
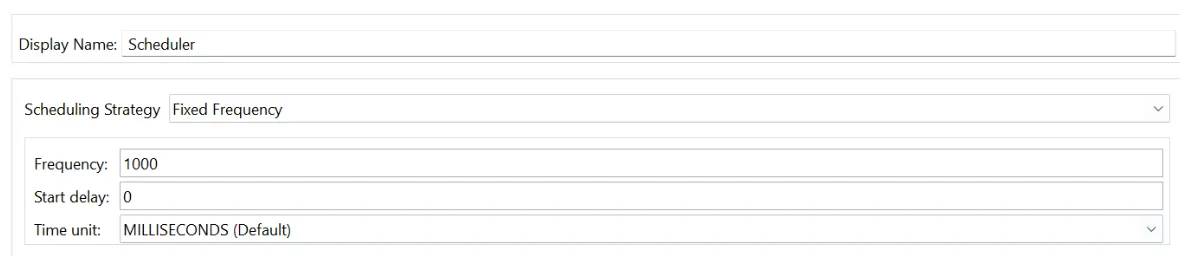
Sample Configuration for the Scheduler using Fixed Frequency
Display Name: Set up a descriptive name for the component.
Scheduling Strategy: The logic you would be using to trigger the Mule flow.
Types of Schedulers in Mule 4
1. Fixed Frequency
This lets you trigger the flow at a fixed interval, such as 10 seconds, every minute, or even an hour. It’s straightforward to configure and suitable for tasks that need to run regularly with predictable timing.
Configurations:
Start delay: After the application is deployed, the delay after which the scheduler will regularly trigger the application.
Time unit: The quantitative measures of time, like milliseconds, seconds, minute, etc.
2. CRON
Mule 4 leverages CRON expressions for more complex scheduling requirements. This is a widely used standard for defining time-based job schedules, such as running a batch job every night at 3 AM or generating a report on the last Friday of every month. This offers flexibility in defining schedules based on specific times, days of the week, days of the month and months of the year.
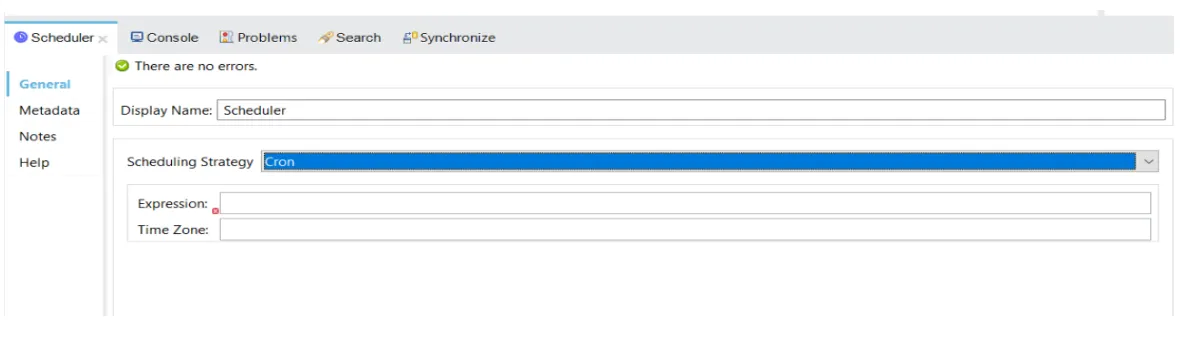
Sample Configuration for the Scheduler using CRON
Configurations:
Expression: It is a string composed of 6 mandatory and one optional field, which are separated by whitespaces.
Timezone: The ID of which the timezone to be followed.
Note that the time zone, if not specified, depends on the time zone of the machine on which the application is deployed. When deployed to Cloudhub, the application always follows the UTC Time Zone regardless of the region in which it is deployed.
This CRON expression format can be represented as:
“SECONDS MINUTES HOURS DAYS MONTHS DAYS-OF-WEEK YEAR”, where year is the optional field.
These fields can be populated with the following values:
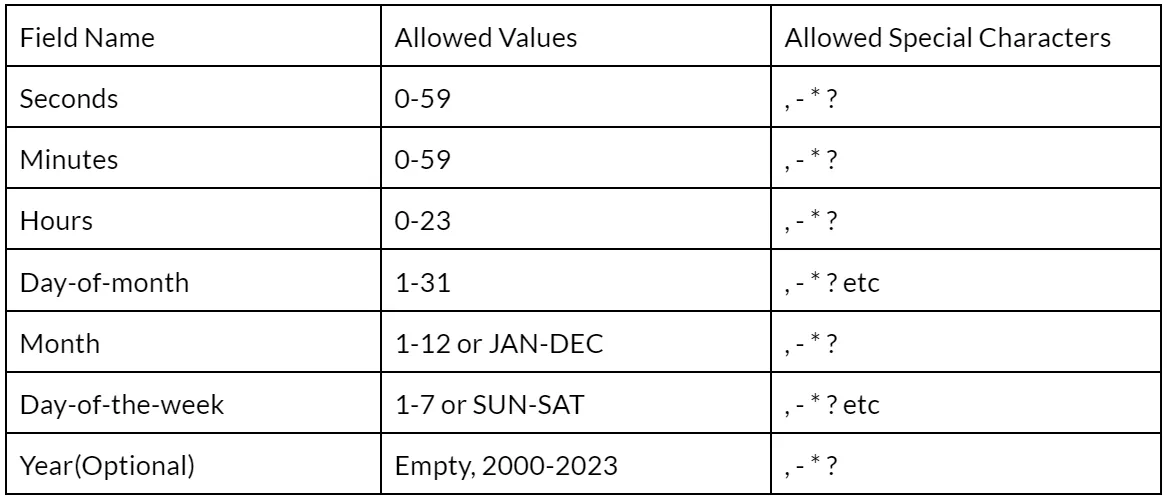
where,
( , ) to specify different exact values
( * ) for all values
( ‘-’ ) For a range of values
( ? ) for no value (if you want to leave the field empty)
( / ) to specify incremental values Eg. 0/3 in minutes means at 0,3, 6,9….
Eg. “0 25 11 * * ? 2023” means Fire at 11:25 am every day in 2023.
Debugging in Anypoint Studio
In Anypoint Studio debug mode, the Mule application will be triggered at intervals specified by the scheduler. But you can manually execute the Scheduler component when debugging by clicking the green arrow icon in Studio Debugger.
Debugging a scheduler-based application in Mule 4
Running Scheduler On-Demand on applications on Cloudhub
If you have an application deployed to Cloudhub, you can trigger the scheduler on demand using: Navigate to the application on Runtime Manager-> Schedules -> Select the scheduler-> Run now
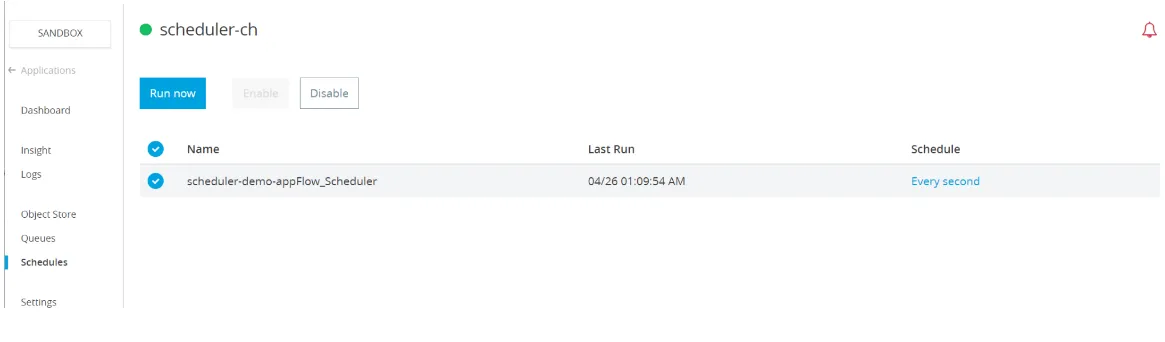
Snippet from Runtime Manager for an app using Scheduler
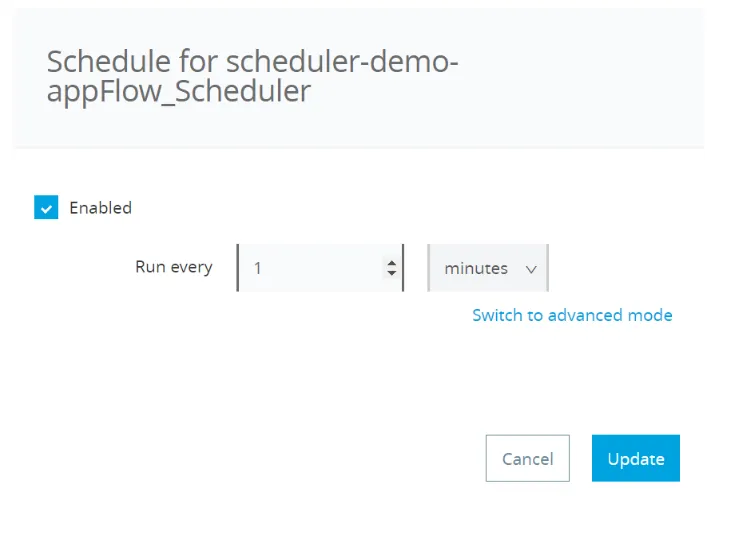
You can even update the scheduling interval by clicking on the schedule mentioned:
Updating the Scheduling Interval in the Runtime Manager
Scheduler Behaviour in Server Groups and Clusters
1. In Server Groups, the scheduler will run independently in each individual node. Since no node is essentially a primary node, the scheduler would run in each node individually
Demo-server-group showing two nodes in Anypoint Platform
2. In the case of Clusters, the scheduler will run only in the primary node since there is state sharing between the nodes. If the primary node goes down, as long as more nodes are present, any one node would become the primary node and would continue polling using the scheduler and would continue to do so even if the previous node starts running again (but is not the primary node)
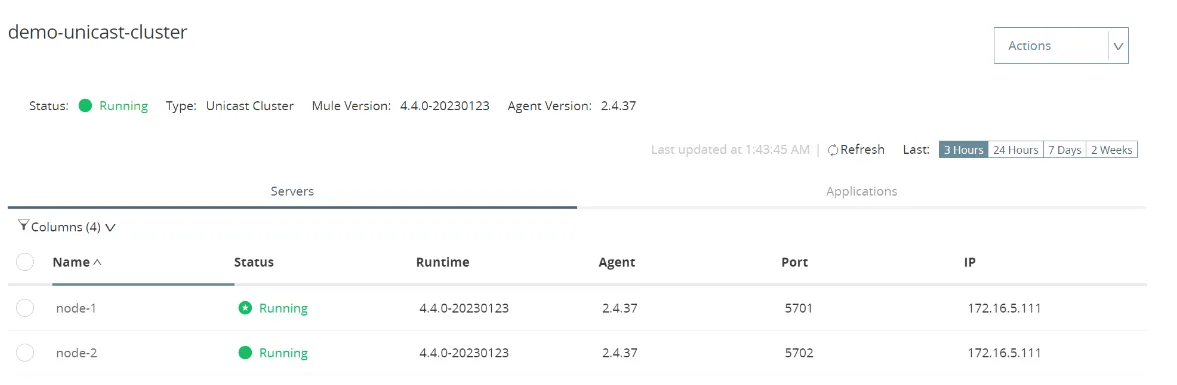
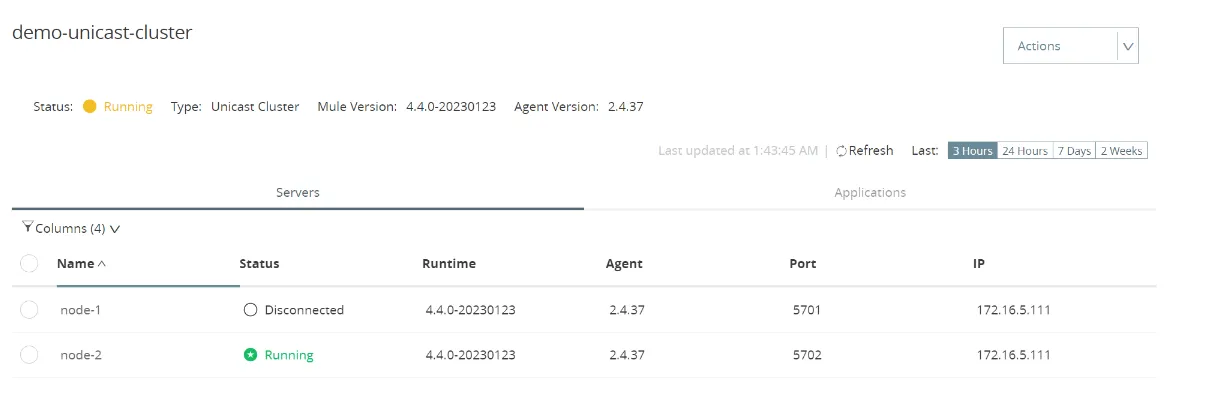
Demo-unicast-cluster showing two nodes in Anypoint Platform
This is a sample unicast cluster of two nodes using Mule Standalone Server that I have created to demonstrate the concept of state sharing.
Currently, the scheduler would be polling in node-1
node-1 goes down and node-2 becomes primary node
But whenever node-1 goes down, node-2 becomes the primary node and polls the scheduler.
DisallowConcurrentExecution
The scheduler, by default, doesn’t wait for the completion of the previously running Mule event before triggering another job as per the schedule. In order to prevent this from happening, we can make use of the disallowConcurrentExecution=”true” attribute.
Note: This attribute is not available in the message flow configuration of the scheduler component, and we need to manually specify this in the xml itself. When not specified explicitly, the value is set to false by default.
For instance:
<scheduler doc:name=”Scheduler” doc:id=”e6f905a0–9eb8–48f2-aab9–1a2ad85c48da” disallowConcurrentExecution=”false” >
Demo:
This is a simple Mule Flow consisting of start and end loggers:
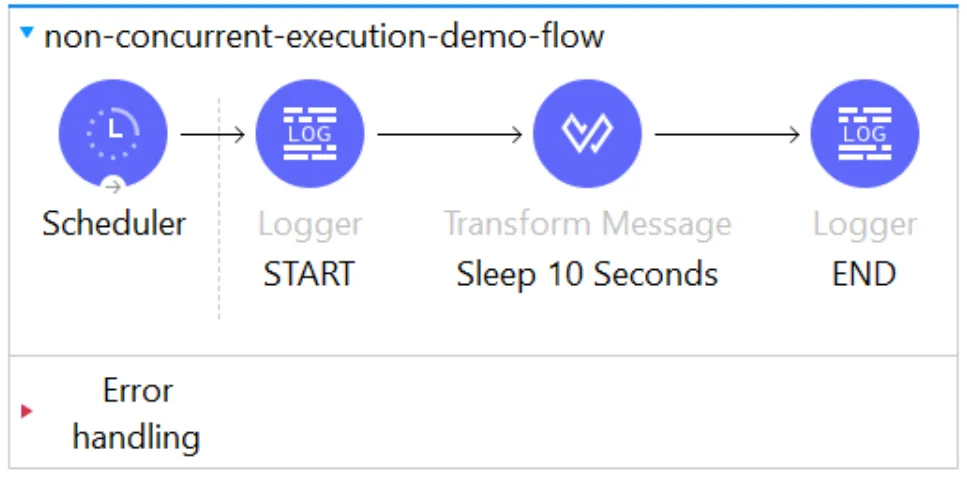
Basic Mule Application to demonstrate disallowConcurrentExecution
It consists of a Transform Message that uses the sleep() function to keep the Mule event waiting for 10 seconds, whereas in the scheduler, we have set a fixed frequency of 5 seconds.
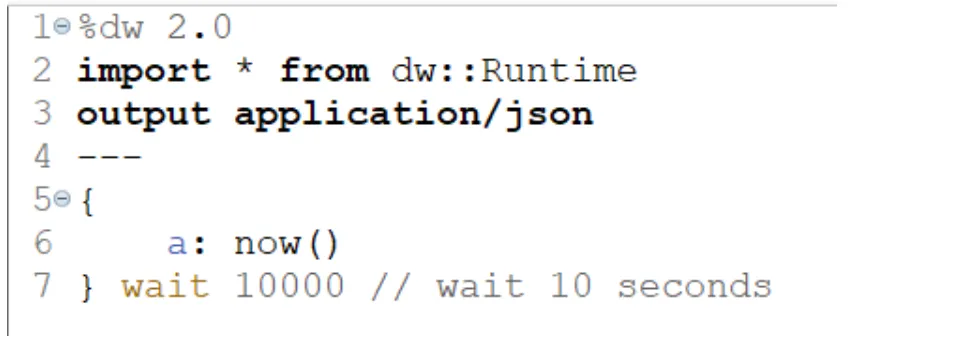
DW 2.0 code to keep the flow waiting for 10 seconds
1. The first snippet from logs shows that if the disallowConcurrentExecution attribute is not set to true, it would keep on triggering the flow until the maximum number of threads is exceeded, to cater to flow processing:
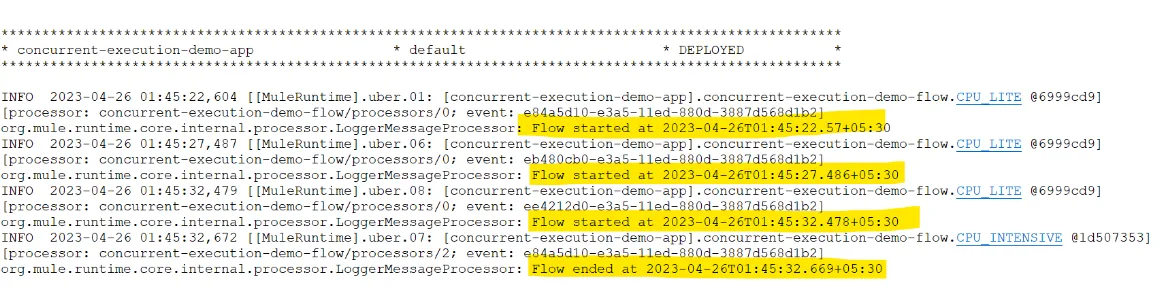
disallowConcurrentExecution=false
2. The second snippet from logs shows that if the disallowConcurrentExecution attribute is set to true, it would skip the flow until the previous execution is completed:
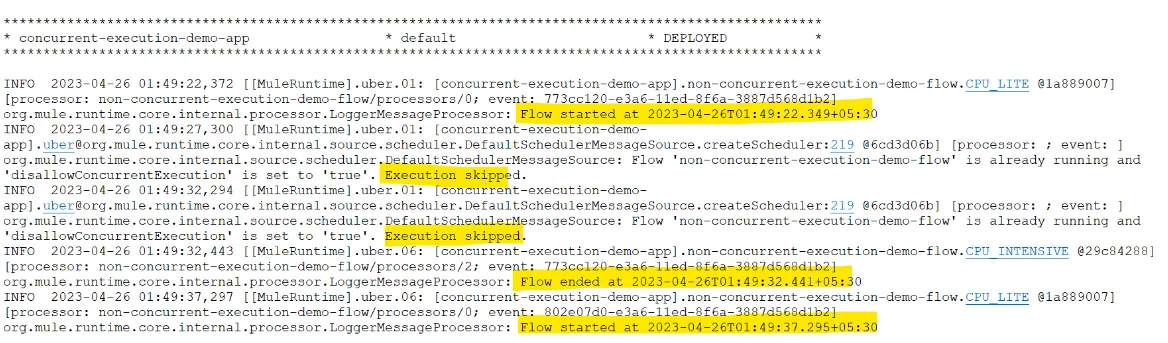
disallowConcurrentExecution=true
3. The third snippet from logs shows that if the disallowConcurrentExecution attribute is not set to true and the maximum number of threads available to the flow are exceeded (here the maxConcurrency at flow level is set to 1, since Mule is reactive programming), back pressure is applied and we get the error stated below:
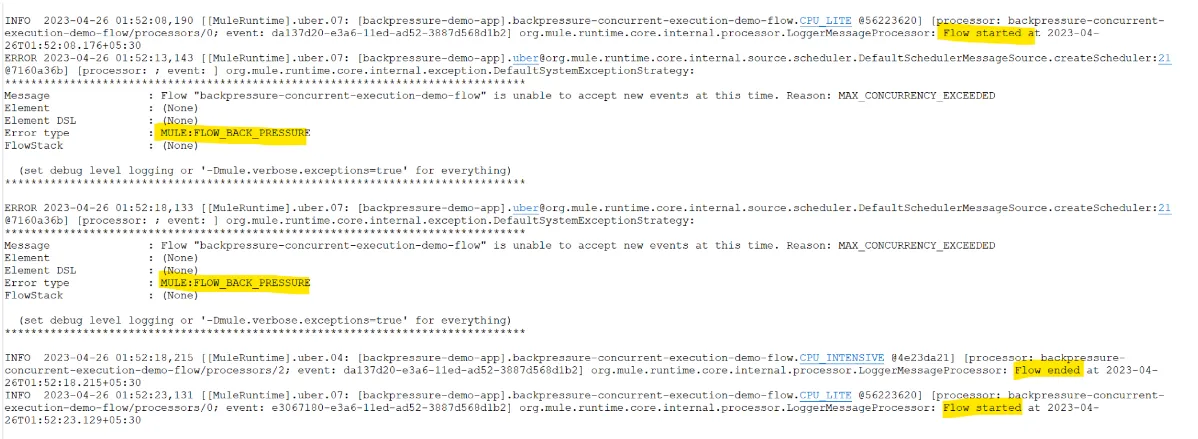
disallowConcurrentExecution=false and maxConcurrency=1
Schedulers are basically used in apps that are used for sync purposes or “Long Running Background Jobs”.
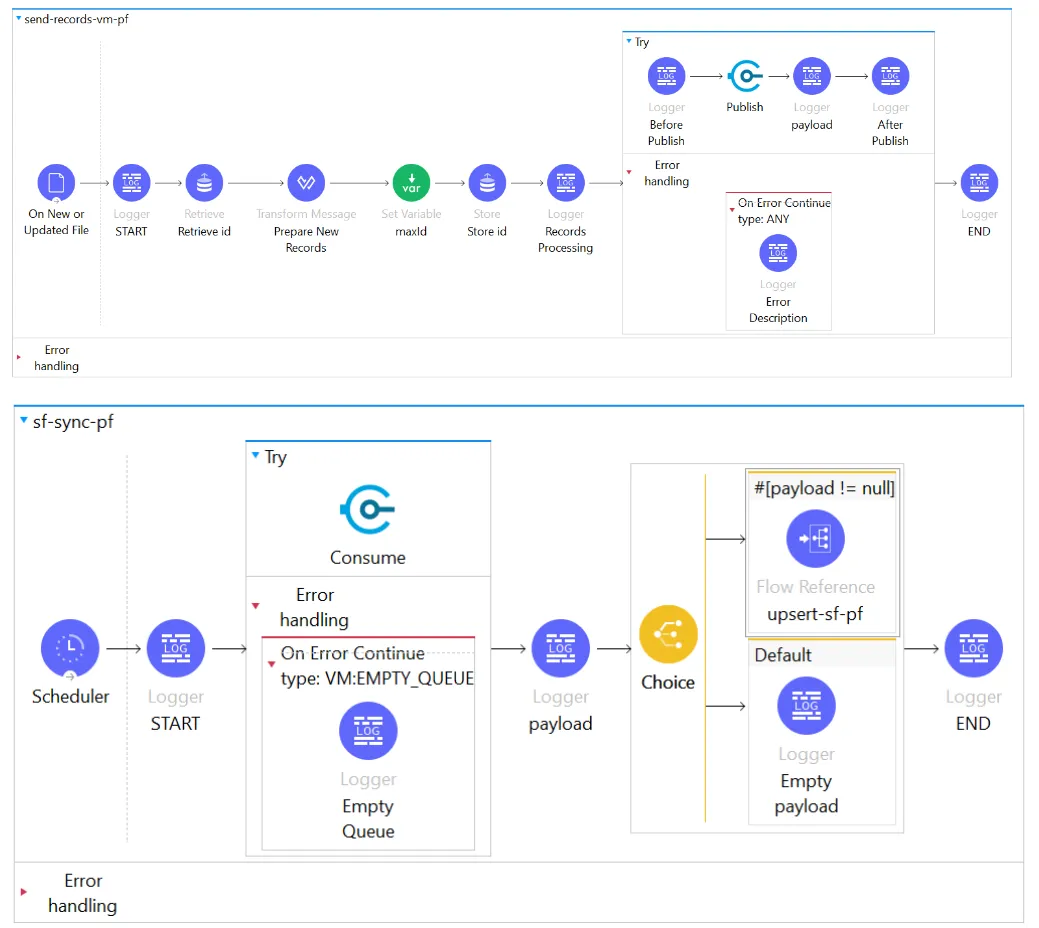
Sample Mule Application to sync the updated/new records from CSV to Salesforce
Examples for Sync Processes can be running a scheduler at a specified time in a day to sync the values that are updated in the Database to Salesforce, or keep a scheduler polling at regular intervals to check updates to the CSV file and update the new records to an end system like Salesforce, which the above Mule Application represents.
Conclusion
Mastering Mule 4 schedulers is an important skill for anyone working with on the MuleSoft platform. By understanding the different types of schedulers and their configuration strategies, you can build more robust integration solutions, automate business processes and improve efficiency.
To learn more about MuleSoft integration and relevant updates, check out our Resource Centre.
Recent Blogs

Salesforce Pricing Automation: Trigger Handlers for Efficiency & Accuracy
In order to succeed in today’s fast-paced business landscape, precision and sp...…

Architecting Scalable Integrations with CQRS Pattern in MuleSoft
Modern integration and distributed systems demand scalability and modularity. As...…

Connecting MuleSoft and Azure SQL with Entra ID
Introduction Establishing a secure connection between MuleSoft and Azure SQL Da...…

Understanding Salesforce Flow Approval Processes
Introduction: Salesforce introduced Flow Approval Processes in the Spring '25 re...…

Capturing Real-time Record Updation Using LWC
Introduction In modern CRM ecosystems, real-time Salesforce integration and s...…

All About Schedulers: Mule 4
In the world of Mule 4, automating repetitive tasks and triggering flows at defi...…

Demystifying CloudHub 2.0 Networking
CloudHub 2.0 is the latest version of MuleSoft's powerful managed runtime platfo...…
Learn how MuleSoft & Salesforce helps businesses create incredible digital experiences. Speak with one of our consultants today
Let's Work Together